Table of Contents
TogglePests don’t knock before entering. They slip through foundation cracks, ride in on firewood, and exploit every weak point in a home’s defenses. Whether it’s a single carpenter ant or a full-blown termite colony, the damage, and the headaches, add up fast. That’s where the concept of “shield pest control” comes in: a comprehensive, layered approach to keeping invaders out and eliminating those already inside. This guide breaks down what shield pest control involves, how it stacks up against DIY methods, and what homeowners need to know to build an effective defense in 2026.
Key Takeaways
- Shield pest control combines barrier treatments, monitoring, exclusion techniques, and ongoing maintenance—creating a proactive defense that prevents pests from entering and eliminates those already inside.
- Professional shield pest control programs use commercial-grade products at higher concentrations (up to 7.9% active ingredients) than DIY options, along with diagnostic expertise to identify pest species and conducive conditions.
- Termites cause over $5 billion in structural damage annually, making professional termite-specific shield programs ($1,200–$3,500) a worthwhile investment compared to potential repair costs of $5,000–$15,000.
- Consistent quarterly or bi-monthly shield pest control service, combined with homeowner exclusion work like sealing gaps, moisture control, and landscaping management, prevents infestations before they become costly problems.
- DIY pest control supplements professional service well for maintenance and light infestations, but structural pests like termites require licensed technicians and specialized equipment that most lenders and real estate transactions mandate.
What Is Shield Pest Control and How Does It Work?
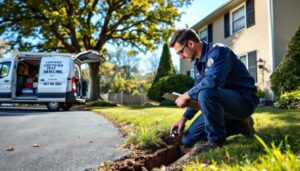
Shield pest control refers to a multi-layered strategy that combines barrier treatments, monitoring, exclusion techniques, and ongoing maintenance to prevent and eliminate pest infestations. Unlike reactive approaches that only address visible problems, shield systems work proactively, creating a protective perimeter around the home.
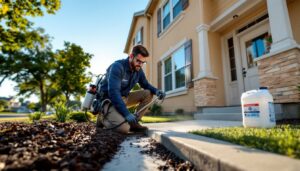
Most professional shield programs start with a perimeter barrier treatment. Technicians apply liquid or granular insecticides around the home’s foundation, typically in a band 3 to 10 feet wide. These treatments target common entry points: expansion joints, weep holes, utility penetrations, and cracks in concrete slabs. The active ingredients, often pyrethroids like bifenthrin or non-repellent agents like fipronil, create a lethal zone that kills pests on contact or after they return to the nest.
Inside, technicians focus on interior monitoring and treatment. This includes placing bait stations in crawl spaces, attics, and behind appliances, as well as treating wall voids and baseboards where pests travel. Many shield programs also incorporate exclusion work: sealing gaps around doors, windows, and plumbing with caulk or copper mesh to physically block pest entry.
Shield pest control typically operates on a quarterly or bi-monthly schedule. Regular visits allow technicians to re-treat barriers, inspect for new activity, and adjust strategies based on seasonal pest behavior. This ongoing approach is far more effective than one-off treatments, especially for persistent invaders like ants, roaches, and rodents.
Common Pests That Require Shield-Level Protection
Not every pest problem demands a full shield approach, but certain invaders justify the investment. Termites top the list. Subterranean termites cause over $5 billion in structural damage annually in the U.S., and they work silently inside walls and floor joists until the damage is severe. Shield treatments for termites often involve liquid termiticides applied around the foundation or bait systems placed in the soil at 10-foot intervals.
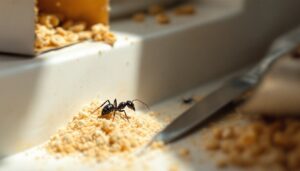
Carpenter ants are another major concern. Unlike termites, they don’t eat wood, they excavate it to build nests, leaving behind smooth galleries and piles of sawdust (frass). A shield strategy targets both the perimeter and indoor nesting sites, often in moist areas like under sinks or near leaky rooflines.
Rodents, particularly mice and Norway rats, require a combination of traps, bait stations, and exclusion. Rodents can squeeze through gaps as small as ¼ inch, so sealing entry points with ¼-inch hardware cloth or steel wool is critical. Understanding the costs associated with rodent control helps homeowners budget for both treatment and prevention.
Cockroaches, especially German and American varieties, thrive in warm, humid environments and reproduce quickly. Shield programs use gel baits, insect growth regulators (IGRs), and residual sprays to break the breeding cycle. Roaches are notoriously resilient, and professional treatment for roaches often delivers faster results than DIY baits alone.
Bed bugs, while less common in perimeter treatments, sometimes necessitate whole-home heat treatments or fumigation, a different category, but worth mentioning for completeness.
Professional Shield Pest Control vs. DIY Solutions
DIY pest control has its place, but it’s not always a substitute for professional shield systems. The biggest advantage pros bring is access to commercial-grade products. Over-the-counter sprays and granules contain lower concentrations of active ingredients and often lack the residual power of professional formulations. For example, a homeowner might buy a bifenthrin spray at 0.25% concentration, while a licensed applicator uses 7.9% for perimeter treatments.
Professionals also bring diagnostic expertise. Identifying the pest species, locating nests, and understanding behavior patterns require training. Misidentifying an ant species can lead to ineffective treatment, carpenter ants need different baits than odorous house ants. Technicians are trained to spot conducive conditions: moisture problems, structural gaps, and conducive landscaping that invites pests.
That said, DIY has a role in maintenance and prevention. Homeowners can apply granular insecticides around the foundation, set snap traps for rodents, and use boric acid dust in wall voids. These methods work well for light infestations or as supplements to professional service. If someone opts for one-time professional intervention, maintaining the barrier between visits becomes a DIY responsibility.
The cons of DIY include inconsistent application and safety risks. Applying pesticides incorrectly can lead to overexposure, contamination of water sources, or ineffective coverage. Mixing products or ignoring label instructions, especially PPE like gloves, goggles, and respirators, can cause health issues. Also, DIY doesn’t typically include the monitoring or follow-up that makes shield systems effective over time.
For structural pests like termites, DIY is rarely adequate. Termite treatments require specialized equipment (soil treatment rigs, injection tools) and knowledge of local soil types and building codes. Most lenders and real estate transactions require professional certification, not DIY documentation.
How to Choose the Right Shield Pest Control Method for Your Home
Selecting a shield pest control approach starts with assessing the home’s pest history, construction type, and local pest pressure. Homes in humid climates or near wooded areas face higher termite and carpenter ant risk. Older homes with crawl spaces and unsealed foundations need more aggressive barrier treatments than newer slab-on-grade construction.
Step 1: Conduct a pest audit. Walk the perimeter and look for signs: mud tubes on foundation walls (termites), frass near baseboards (carpenter ants), droppings in cabinets (rodents), or live insects around entry points. Inside, check under sinks, in attics, and around HVAC penetrations. Document any moisture issues, leaky pipes, poor drainage, or condensation, since water attracts most pests.
Step 2: Evaluate treatment options. For general shield coverage, liquid perimeter treatments offer broad-spectrum control against ants, roaches, spiders, and occasional invaders. Granular products work well on lawns and mulch beds but wash away in heavy rain. Bait systems (like Sentricon for termites or Advance stations for ants) provide targeted, low-toxicity control.
Step 3: Decide on service frequency. Quarterly service is standard for most regions, but homes in high-pressure areas, think coastal or wooded properties, may need bi-monthly or even monthly visits. Seasonal pests like boxelder bugs or stink bugs might only require spring and fall treatments.
Step 4: Vet contractors carefully. Look for state-licensed applicators with liability insurance. Ask about the products they use, how they handle re-treatments, and whether exclusion work is included. Reading reviews on platforms like Angi helps identify reliable providers. Some national chains offer brand recognition, but local operators often provide more personalized service. Understanding pricing structures of major providers can inform negotiations.
Step 5: Consider eco-friendly options. Integrated Pest Management (IPM) emphasizes non-chemical methods first: exclusion, sanitation, and habitat modification. When pesticides are necessary, eco-friendly pest control uses low-toxicity formulations like botanical oils, diatomaceous earth, or borate treatments. These are safer for pets and children but may require more frequent application.
Preventative Measures to Enhance Your Pest Control Shield
Even the best chemical barrier fails if a home invites pests with open arms. Prevention starts with exclusion. Walk the exterior and seal any gap larger than ⅛ inch. Use silicone or polyurethane caulk for cracks in siding and around windows. For larger gaps (like where utilities enter), stuff them with copper mesh or steel wool, then cover with expanding foam or mortar.
Pay attention to doors and windows. Install door sweeps on exterior doors, ensuring the rubber gasket contacts the threshold with no light visible underneath. Replace worn weatherstripping around windows and garage doors. Repair or replace damaged window screens, 16-mesh or finer keeps out most flying insects.
Moisture control is critical. Fix leaky pipes, especially under sinks and around water heaters. Ensure gutters and downspouts direct water at least 6 feet from the foundation. In crawl spaces, install 6-mil polyethylene vapor barriers over dirt floors and maintain ventilation to keep humidity below 60%. Dehumidifiers help in basements prone to dampness.
Landscaping matters. Keep mulch, firewood, and leaf piles at least 12 inches away from the foundation. Trim tree branches that overhang the roof, these act as highways for ants, squirrels, and roof rats. Remove stumps and dead wood, which attract termites and carpenter ants.
Inside, practice sanitation. Store food in airtight containers, clean up crumbs promptly, and don’t leave pet food out overnight. Take garbage out regularly and use bins with tight-fitting lids. Declutter storage areas, pests love cardboard boxes and stacks of newspapers.
For ongoing monitoring, place glue traps in basements, attics, and under sinks. Check them weekly. A sudden uptick in catches signals a problem before it becomes an infestation. Some homeowners also use electronic monitors or even pest control trucks for mobile treatment options.
Cost Considerations and Long-Term Value
Shield pest control pricing varies widely based on home size, pest type, and service frequency. Initial treatments typically range from $150 to $400 for a standard single-family home (1,500 to 2,500 square feet). Quarterly maintenance runs $100 to $150 per visit. Annual contracts, which bundle four visits, often cost $400 to $700, a modest savings over pay-per-visit pricing.
Termite-specific shield programs are pricier. Liquid treatments cost $1,200 to $2,500 depending on linear footage and soil conditions. Bait systems run $1,500 to $3,500 installed, with annual monitoring fees around $300. These costs, while steep, pale compared to structural repairs. Replacing termite-damaged floor joists or sill plates can hit $5,000 to $15,000.
DIY shield approaches cost less upfront but require more labor. A gallon of professional-grade concentrate (enough for multiple applications) runs $40 to $100. Granular products cost $20 to $50 per 20-pound bag. Add caulk, copper mesh, door sweeps, and traps, and a DIY setup might total $200 to $400 the first year, with $100 annually for re-treatment.
When comparing cost guides on platforms like HomeAdvisor, remember that regional pricing varies. Urban areas and states with high pest pressure (Florida, Texas, California) tend to run 20% to 40% higher than rural Midwest markets. Always get multiple quotes, three is standard, and ask what’s included. Some companies charge extra for crawl space treatments or rodent exclusion.
The long-term value of shield pest control lies in prevention. A single termite infestation can cost more than a decade of quarterly service. Rodents chew wiring, creating fire hazards. Carpenter ants compromise structural integrity. For resources on renovation costs and project planning, ImproveNet offers detailed breakdowns.
Homeowners should also factor in peace of mind. Knowing the home is protected allows for better sleep and less stress, especially for those who’ve dealt with infestations before. Some insurance policies offer discounts for homes with active termite protection, offsetting part of the cost.
Conclusion
Shield pest control isn’t a luxury, it’s smart home maintenance. By combining professional treatments, vigilant exclusion, and consistent monitoring, homeowners build a defense that keeps the worst invaders at bay. Whether opting for quarterly professional service or a hybrid DIY approach, the key is consistency. Pests exploit every lapse, every unsealed crack, every moisture problem left unchecked. Address those weak points, and the home stays protected.